Easy Manual : Learn Musical Sampling in a Day with SnapBeat
Use SnapBeat to start musical sampling, edit samples, and play sounds in one day. No thick guides needed!
Table of Contents
Onboarding tutorial video – let’s make noise!
Thank you very much for purchasing SnapBeat. This video is for onboarding tutorial for users who have just unboxed the product. To start SnapBeat, you don’t have to buy additional costly devices such as vinyl record player or expensive speakers. Prease prepare just below items.
- earphones
- USB charger with type C cable (you can use the charger of your smartphone)
Please watch the video below and touch with your SnapBeat. Have a fun!
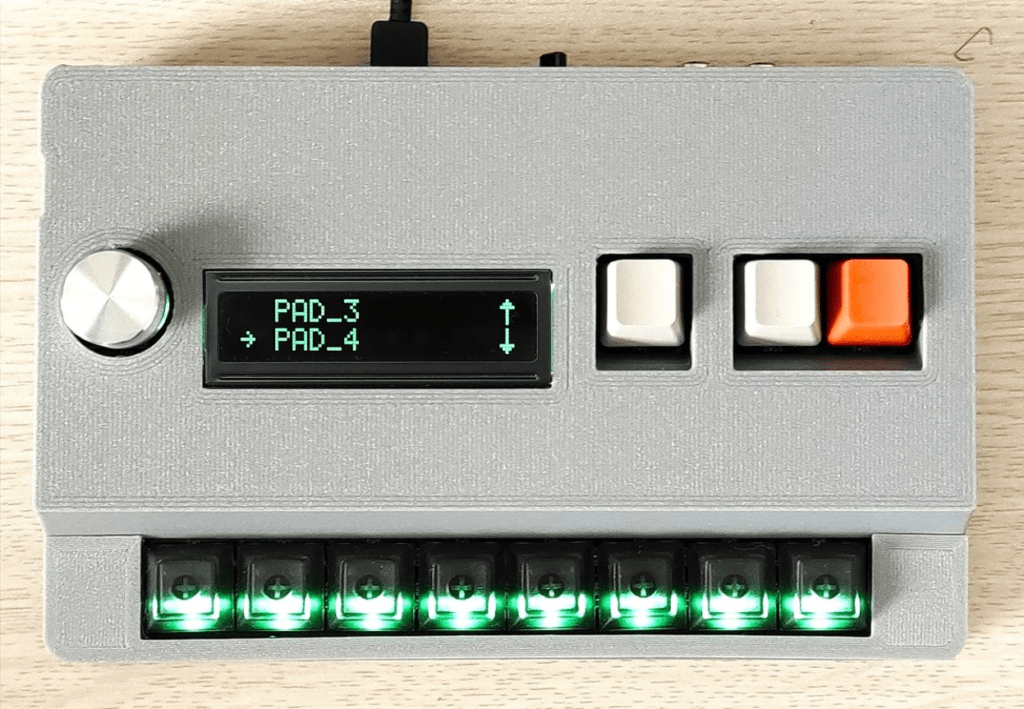
Part names and functions
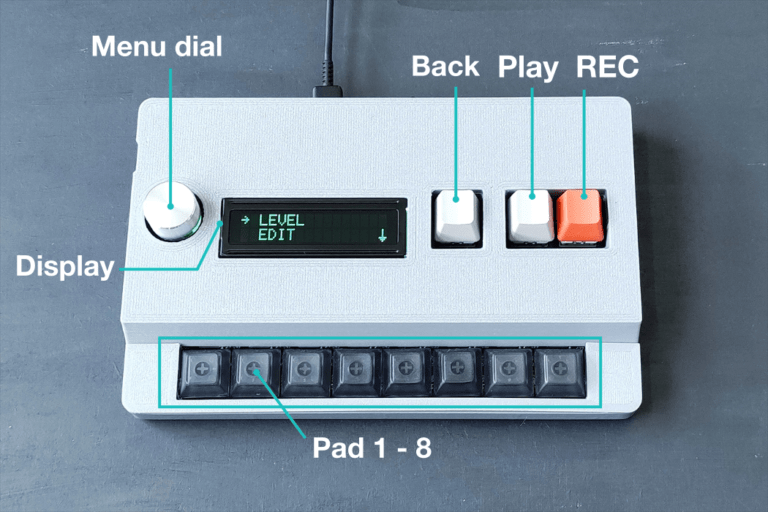
- Display
Show menus and information. - Menu dial
Rotate clockwise and counter clockwise for selecting menu.
Push to enter or confirm the selected menu. - Back button
Back to previous and upper menu. - Play button (Only used in TRUNCATE menu)
Press to hear the truncated sound for the selected Pad to confirm the start and end point. - REC button (Only used in TRUNCATE menu)
Press to start sampling and hold press during sampling. Sampling is finished on releasing REC button. - Pad 1 – 8
Hit to play sampled sounds of each Pads.
Although SnapBeat is polyphony and can play eight sounds at the same time, simultaneous press of keys is not valid in real-time play mode.
Multiple sampled sounds can be triggered at the same time when they are triggered from MIDI IN interface.
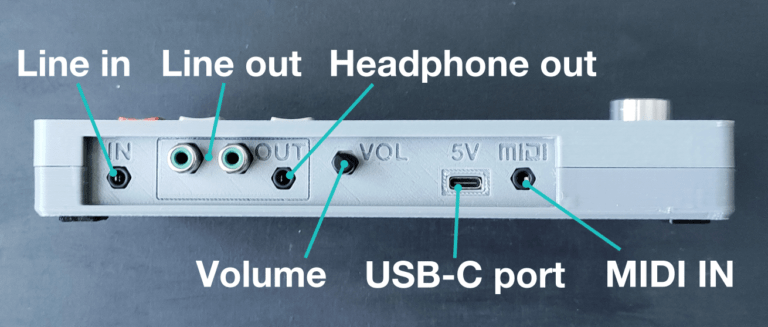
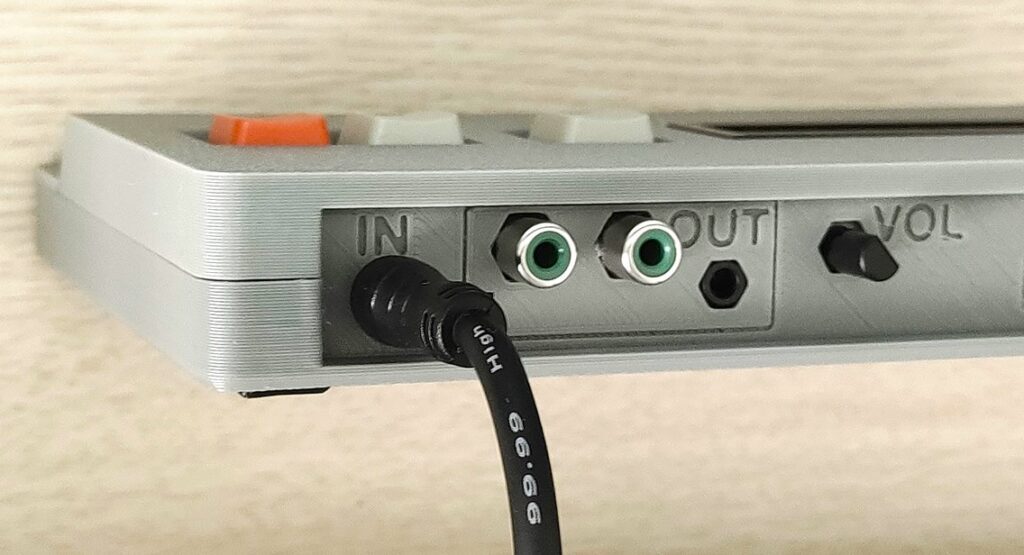
- Line in
Connect to audio sources such as audio player, PC and smartphone with 3.5mm stereo cable. In Sampling, SnapBeat records sound from this input. - Line out
All eight channels mixed output. Connect to external speakers or amplifier with stereo analog cable. - Headphone out
Connect to headphone or earphone. - Volume
Adjust volume of played sounds of headphone output and line out.
The volume is shared with headphone output and line out. - USB-C port
Connect USB type C charger for 5V power supply. - MIDI IN
Connect external MIDI devices such as sequencer or MIDI keyboard via MIDI cable.
Please use 3.5mm TRS type MIDI cable.
There are some variants of TRS MIDI cable, but SnapBeat is compatible with following standard (Specification for use of TRS Connectors with MIDI Devices [RP-054]). Please use 3.5mm TRS type MIDI cable such as BOSS brand one.
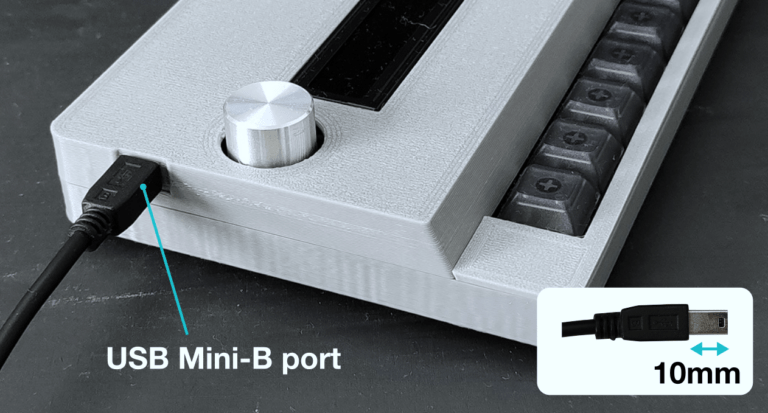
- USB Mini-B port
Used only for updating firmware of Arduino Nano controller.
Please prepare a long plug (more than 10mm) type USB Mini-B cable.
Play sampled sounds
Playing sampled sounds by hitting pads is the basic and only major function of SnapBeat. When you are on the top menu (LEVEL, EDIT and SETTING are displayed), you can play sampled sounds by hitting each pads and/or receiving MIDI note on messages. In some menu layers, you can’t play sounds by pressing pads. In that case, please press BACK button until it returns to the top of the menu.
Although SnapBeat is polyphony and can play 8 sounds simultaneously, pressing multiple pads simultaneously is invalid and only one sound can be triggered by pressing pad at the time (It’s because SnapBeat detects every pads condition through one shared A/D converter input). If you want to trigger multiple sounds at the same time, please trigger sounds by MIDI IN input.
To hear the sounds, please connect your headphones or speakers with headphone out or line out.
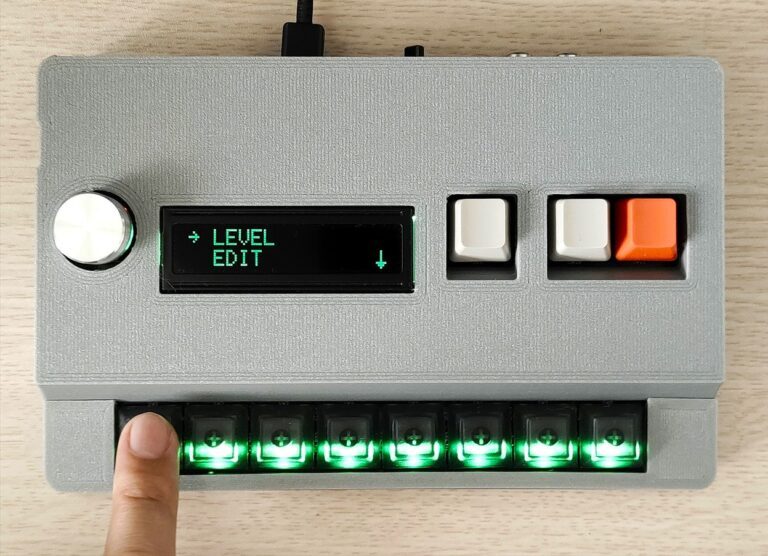
LEVEL
In the LEVEL menu, you can adjust levels of the sampled sounds assigned to each pads.
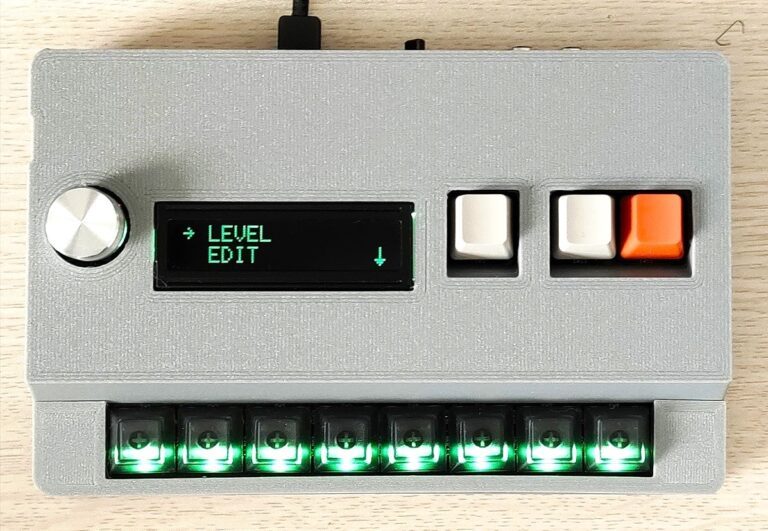
Rotate a menu dial until right arrow aligns to LEVEL menu. Then press menu dial to enter the menu.
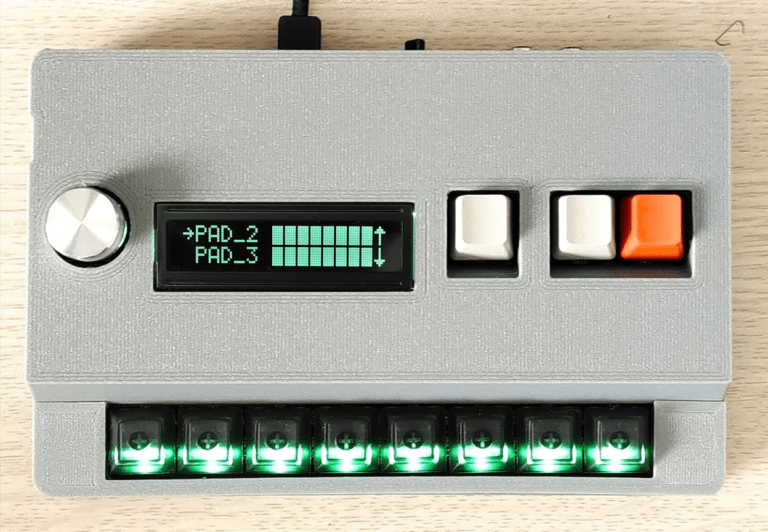
Rotate menu dial and select the sound (pad) which you want to adjust the level. You can monitor sounds of each pads by hitting them. Press menu dial to select the sound.
Then, the right arrow jumps to the right bars which represents of level (volume) of sampled sound recorded for selected pad. Volume is from 1 to 8.
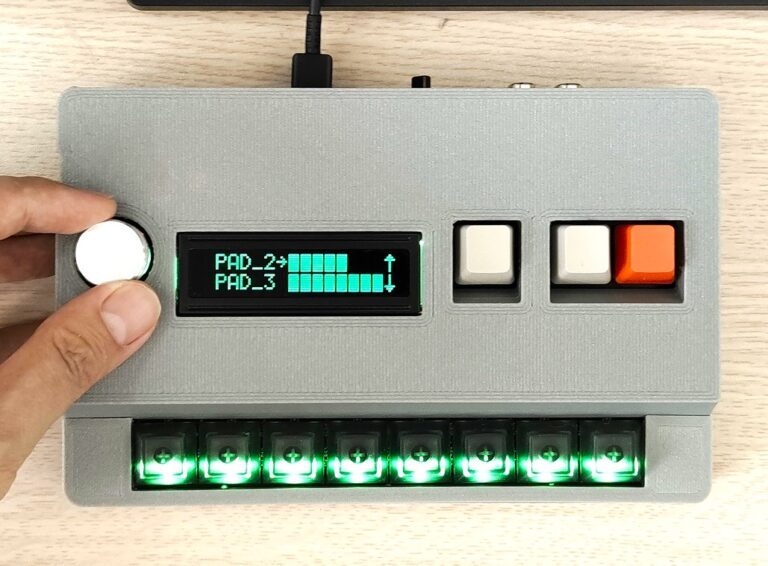
You can decrease or increase the level by rotating menu dial. (In the left photo, the level of sound on pad_2 is five out of eight.) Again, you can monitor sounds of each pads by hitting them anytime.
Press BACK button. The updated level is saved in internal memory and it doesn’t vanish after power off.
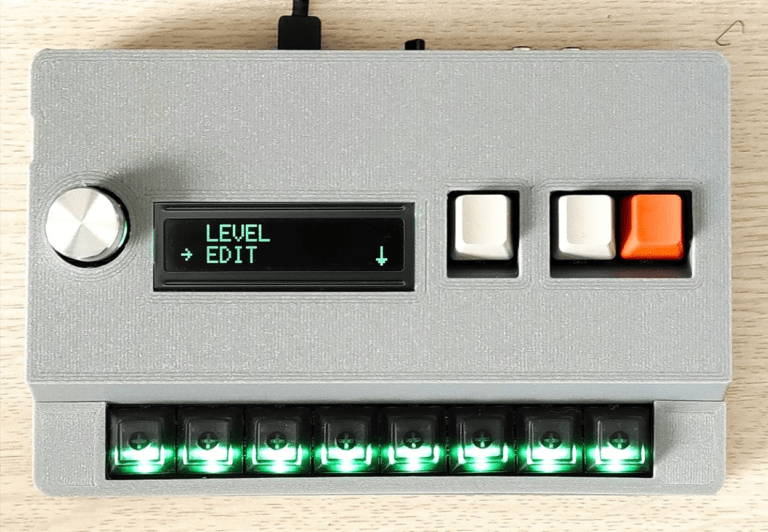
EDIT

Rotate a menu dial until right arrow aligns to EDIT menu. Then press menu dial to enter the menu.
Rotate menu dial and select the pad which you want to edit its sound. Then, press menu dial to enter.
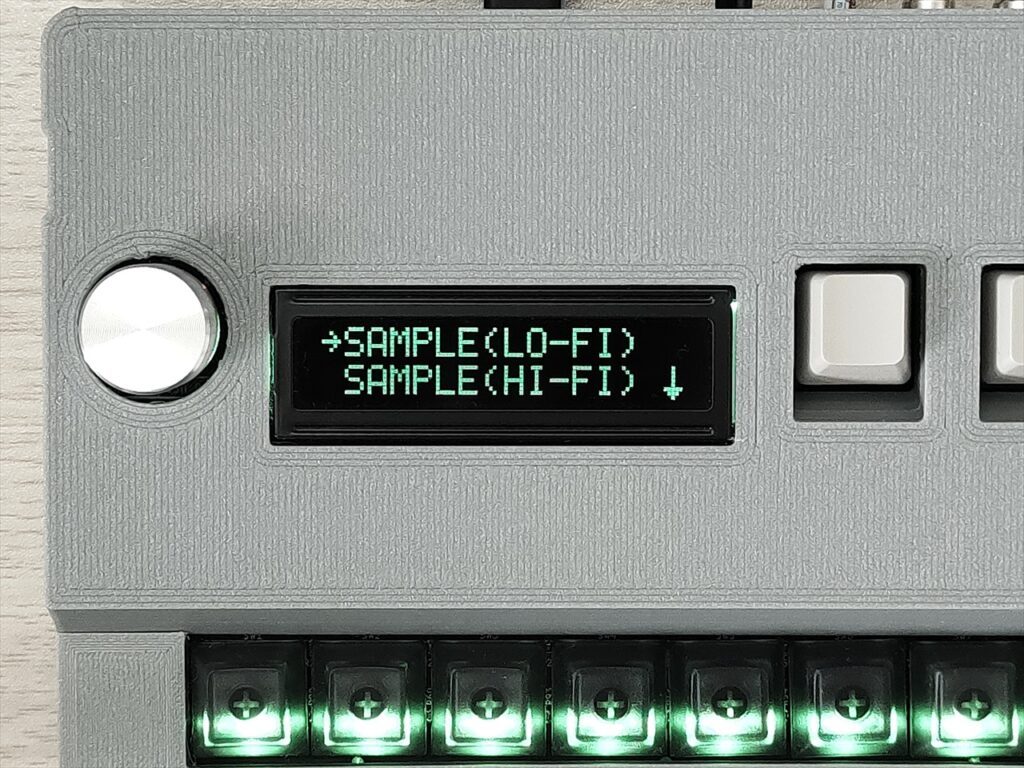
Rotate a menu dial and select from the options below. Then press menu dial to enter the menu.
- SAMPLE(LO-FI)
- SAMPLE(HI-FI)
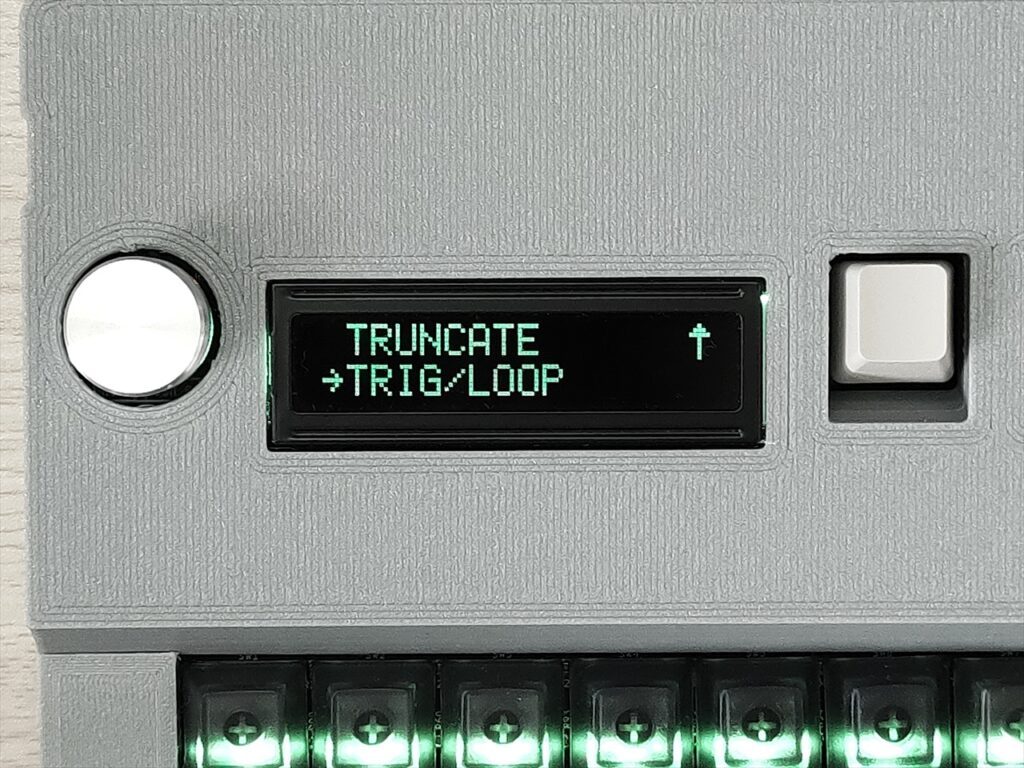
- TRUNCATE
- TRIG(GER)/LOOP
SAMPLE(LO-FI)/(HI-FI)
In SAMPLE (LO-FI) and SAMPLE (HI-FI) menu, you can sample new sound to selected pad. The difference of LO-FI and HI-FI is their recording sound quality.
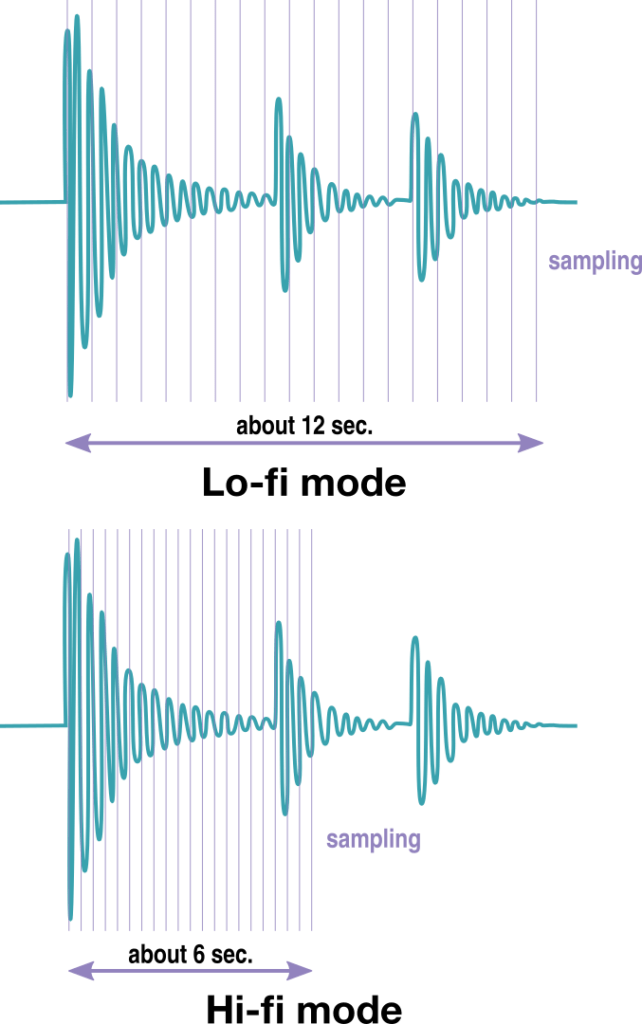
- LO-FI
sampling frequency : about 12kHz
maximum sample length per channel : about 12 sec - HI-FI
sampling frequency : about 20kHz
maximum sample length per channel : about 6 sec
HI-FI sampling is based on below technics to hack the voice recorder chip’s limitation.
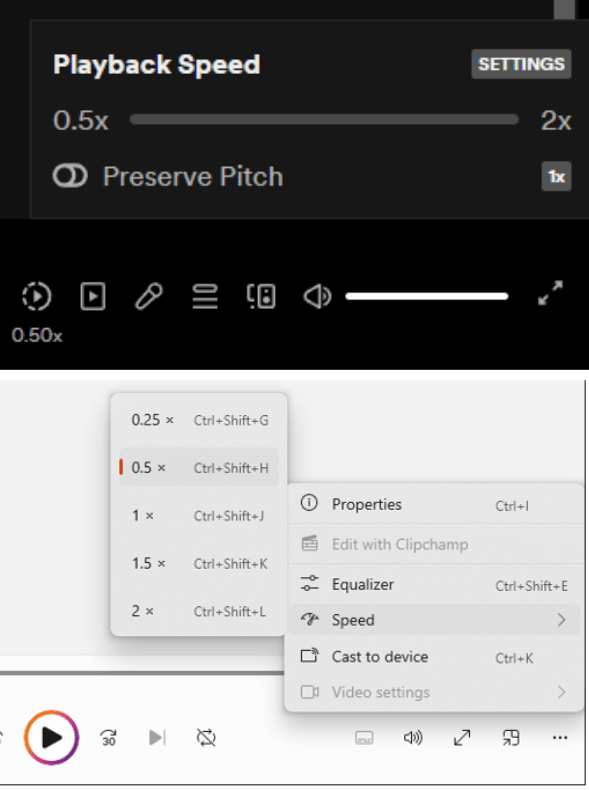
- Record sound which is played with x0.5 speed.
- When playback, the sampled sound is played with x2 speed (SnapBeat does this automatically).
Don’t forget to set playback speed of your audio source to x0.5 when sampling with HI-FI mode.
Hi-Fi mode is suitable for sampling high pitch sounds. Also it’s useful because the sampling segments become finer and it becomes easier to adjust start and end point in TRUNCATE.
Before starting sampling, please connect your audio source to the line in input of SnapBeat with 3.5mm stereo cable.
Input stereo audio signal is mixed as monaural internally.
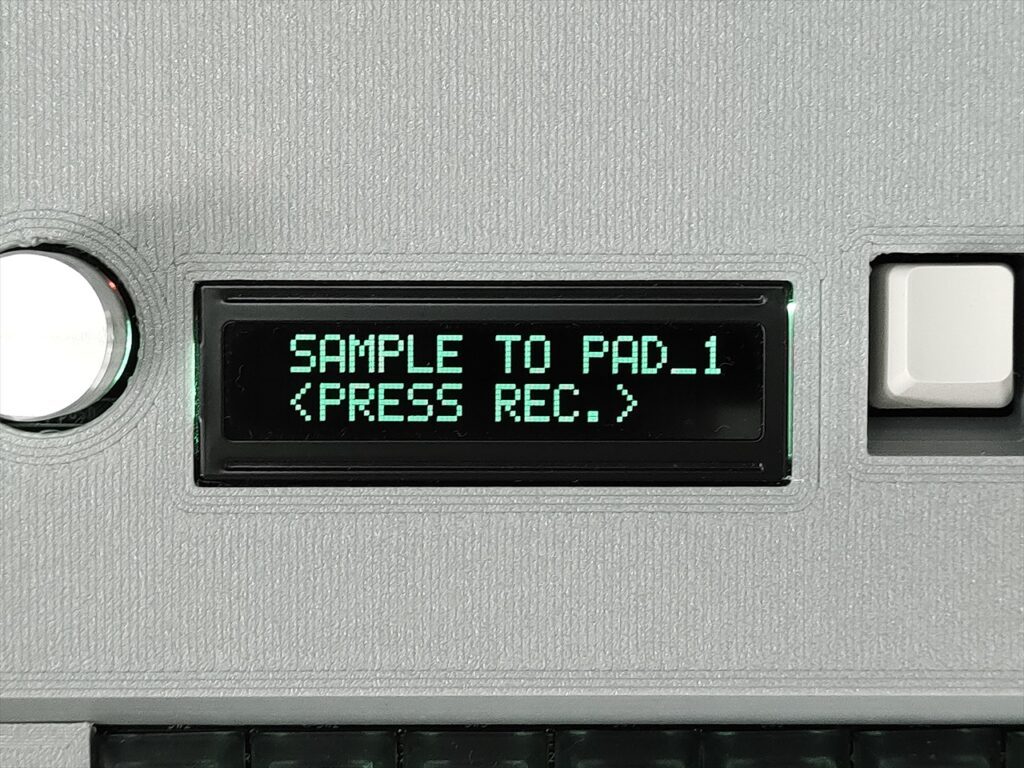
On pressing REC button (red one), sampling starts.
At the same time, please play sound from your audio source.
When sampling with HI-FI mode, please don’t forget to set playback speed of your audio source to x0.5.
(Spotify web player and window media player can change playback speed as left pictures)
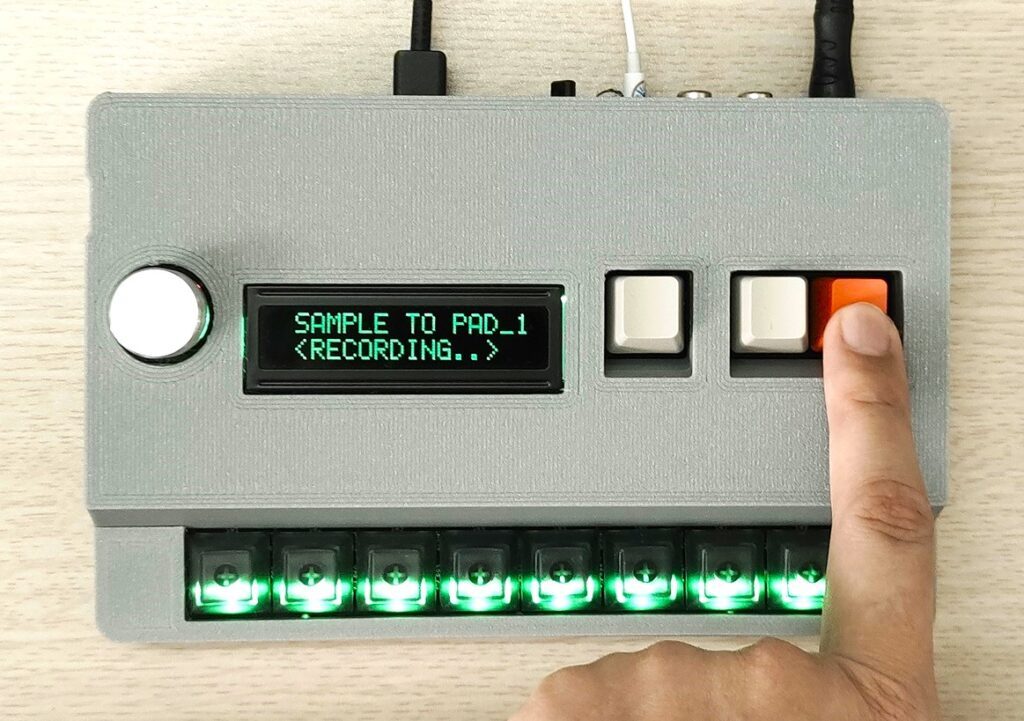
Display changes into <RECORDING..>.
Hold REC button during sampling.
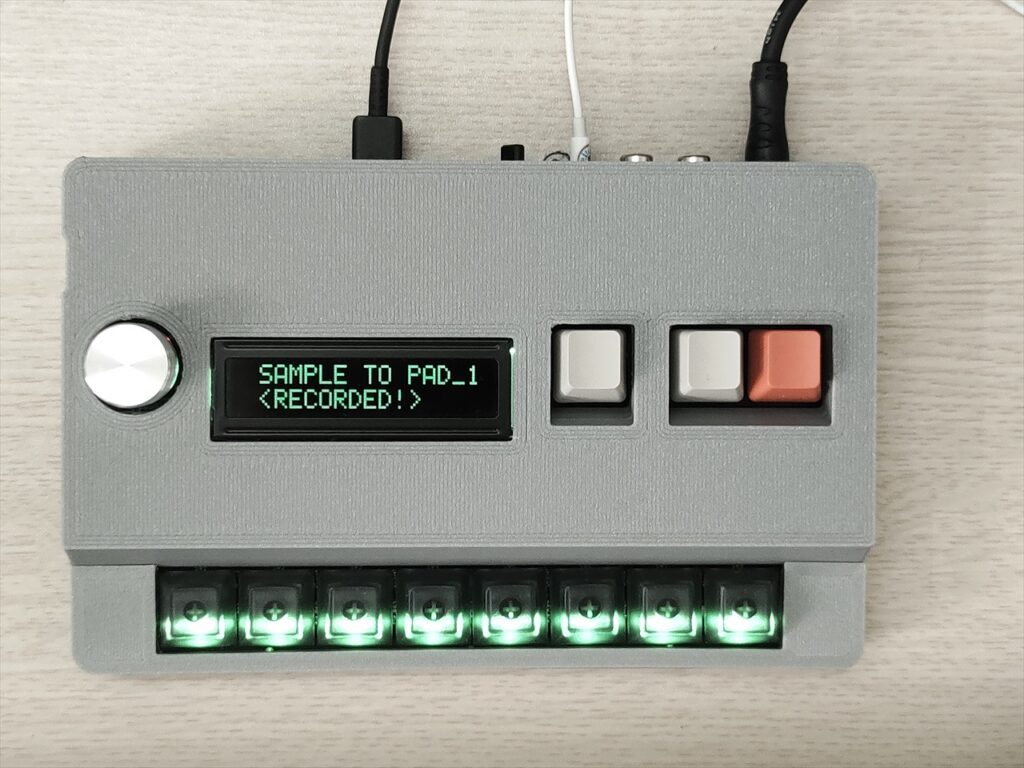
When REC button is released, sampling is finished.
Display changes into <RECORDED!>.
Press BACK button and returns to previous menu.
After completing sampling, you can TRUNCATE or change TRIG (TRIGGER) / LOOP settings.
TRUNCATE
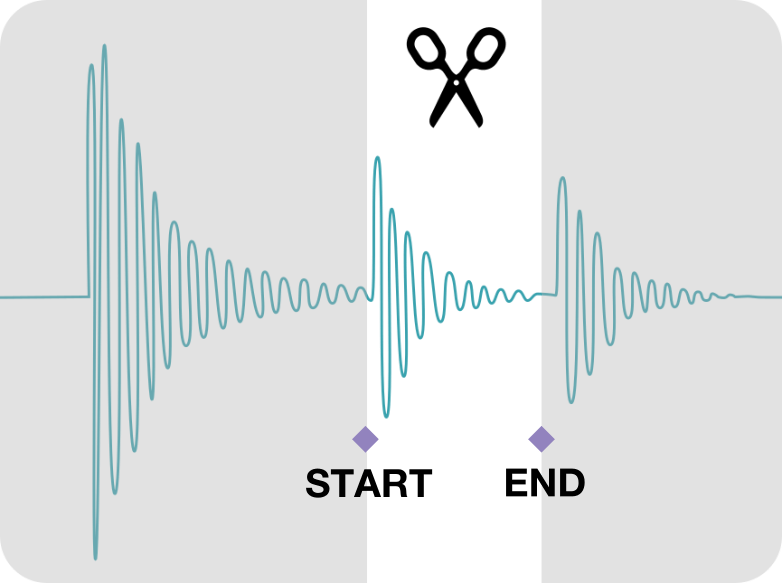
In TRUNCATE menu, you can cut away unwanted parts of the sampled sound by setting start and end points. By truncating, you can play only the desired parts of the sound.
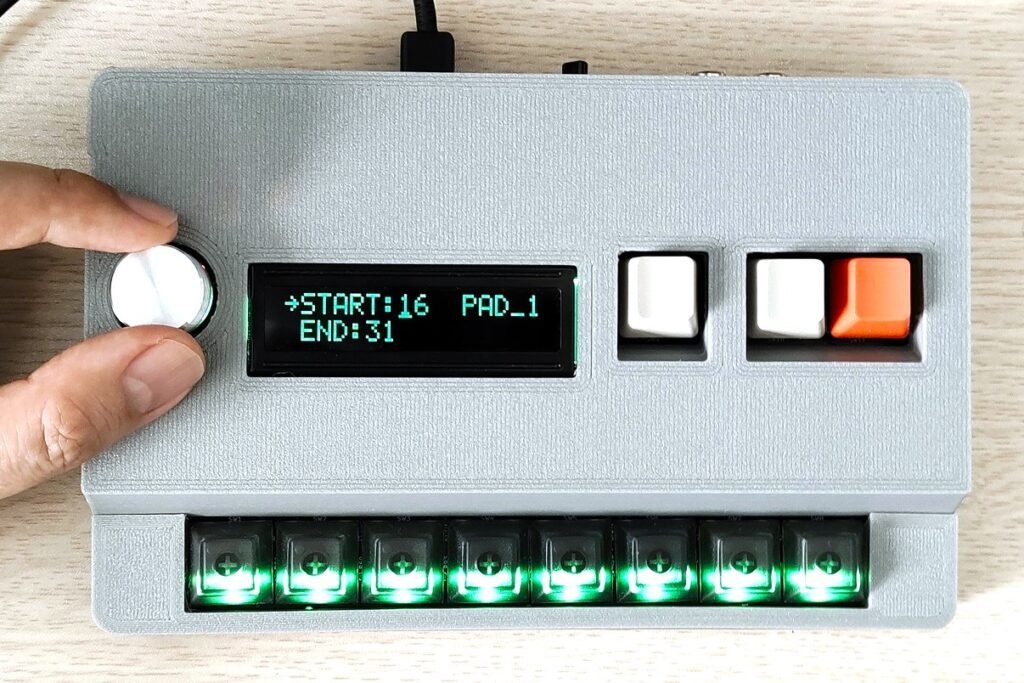
When the right arrow aligns to START, you can set the start point by rotating menu dial.
The start and end point values are from 16 to 159.
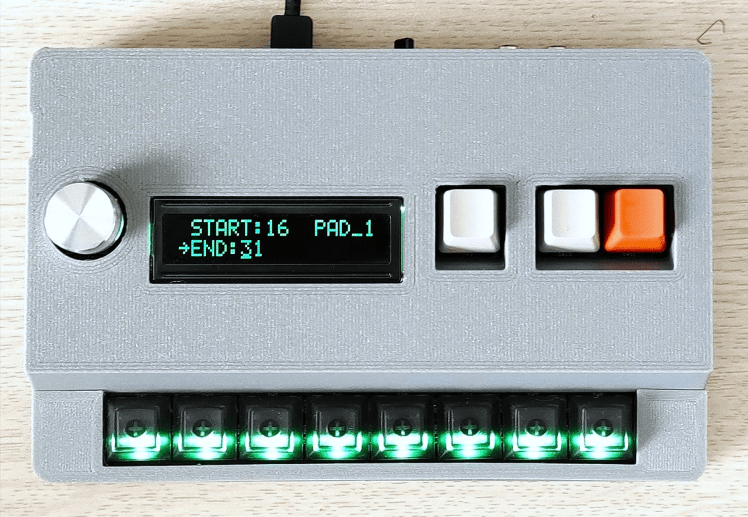
By pressing menu dial, the right arrow jumps to END.
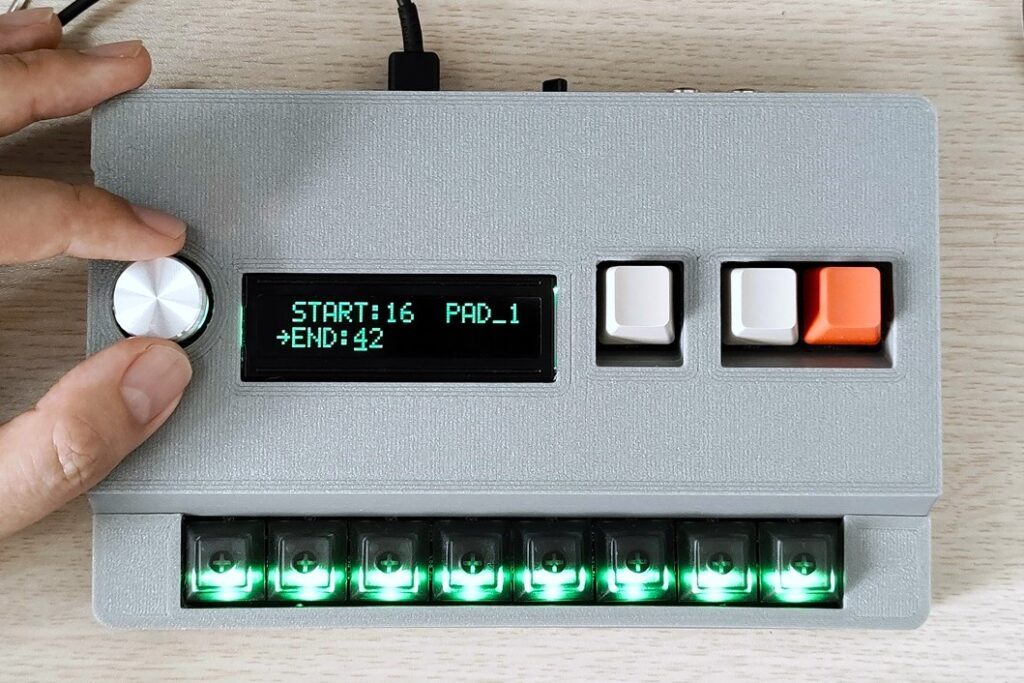
Then you can set the end point by rotating menu dial.
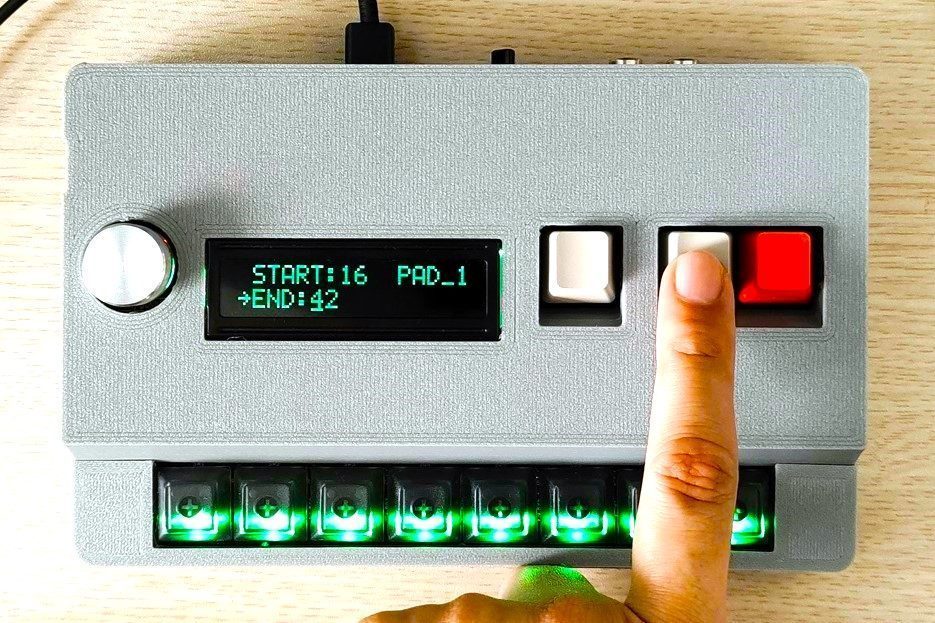
By pressing PLAY button in TRUNCATE menu, you can hear the truncated sound.
(This operation is available both in setting start and end addresses.)
TRIG/LOOP
In TRIG (TRIGGER)/LOOP menu, you can change pad responses and loop setting for selected pad (sound). About pad responses, please refer the next explanation.
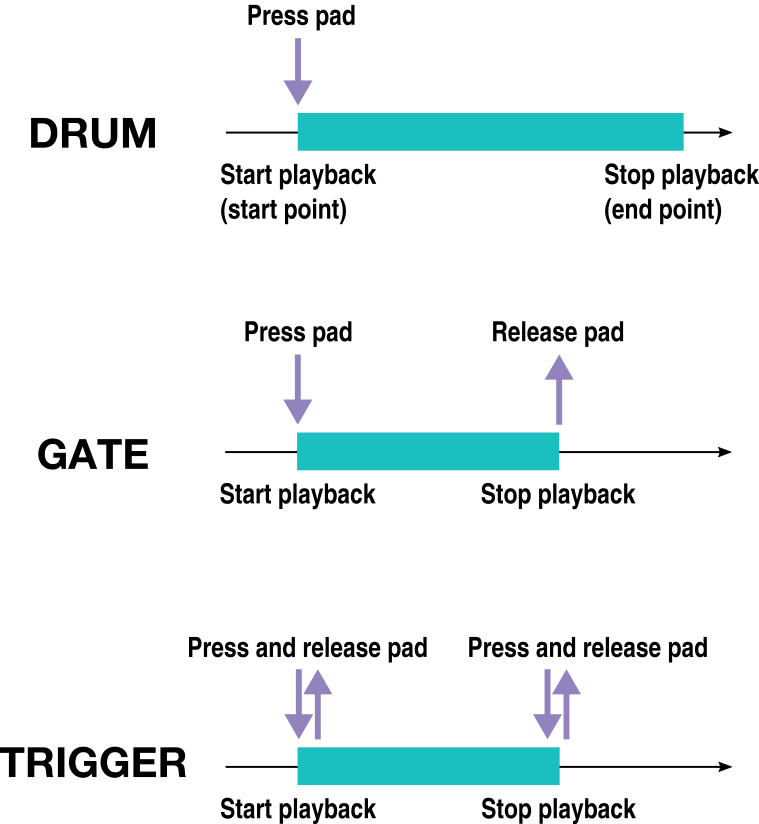
You can choose pad responses from 3 different type.
- DRUM
When a pad is pressed, sampled sound on the pad is played until its end. This response is suitable for sounds such as drums. - GATE
When you press the pad, the sampled sound will play. And it will stop when pad is released. In short, the sampled sound will play only during the pad is being pressed. When loop is ON, the sampled sound will be repeated until the pad is released. - TRIGGER
The sound will altarnate between playback and stopped each time the pad is pressed. When loop is ON, the sampled sound will be repeated until the pad is pressed again.
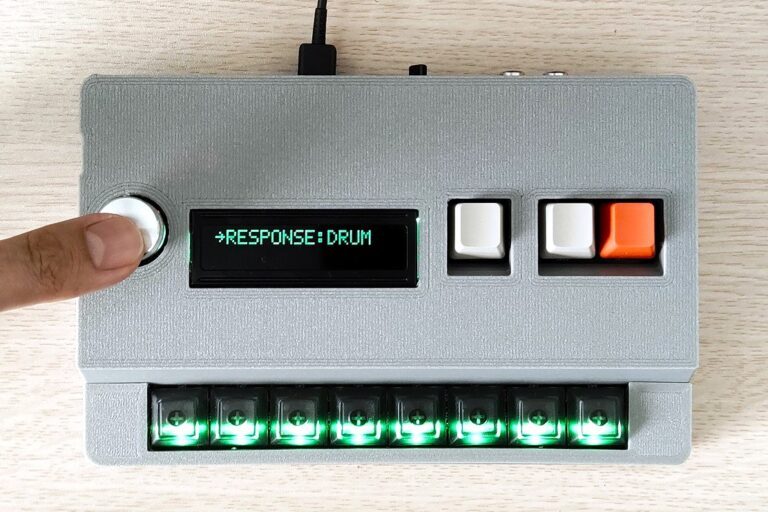
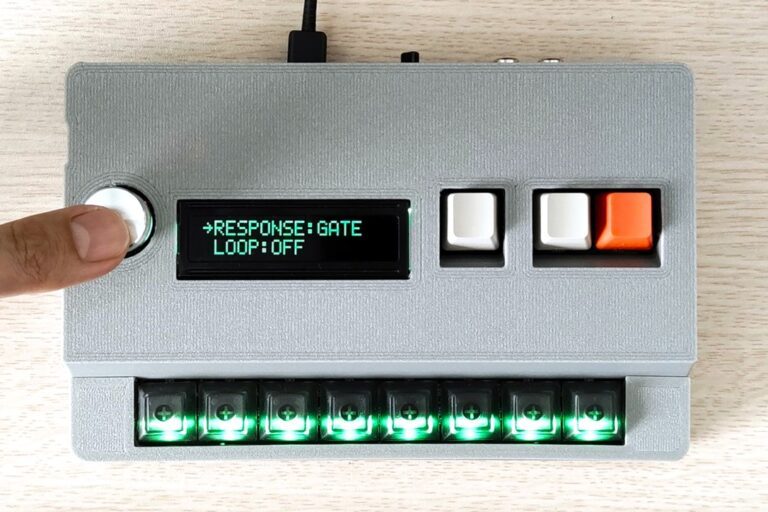
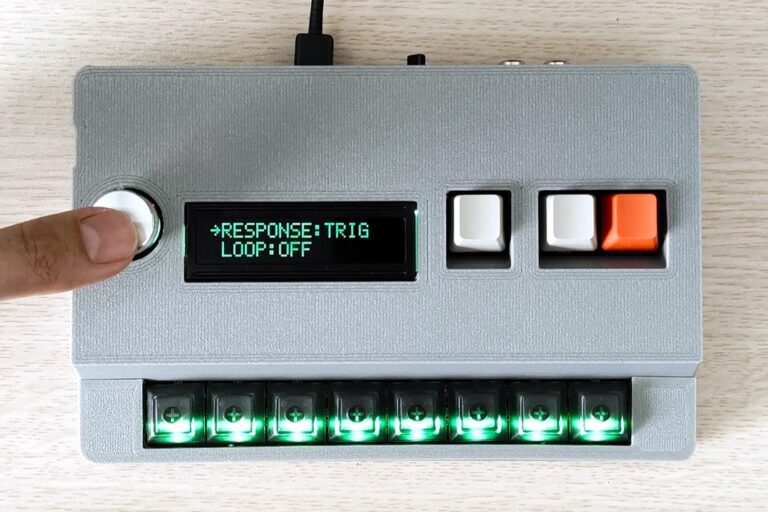
When the right arrow aligns to RESPONSE menu, everytime you press the menu dial, the pad responses changes among DRUM, GATE and TRIGGER.
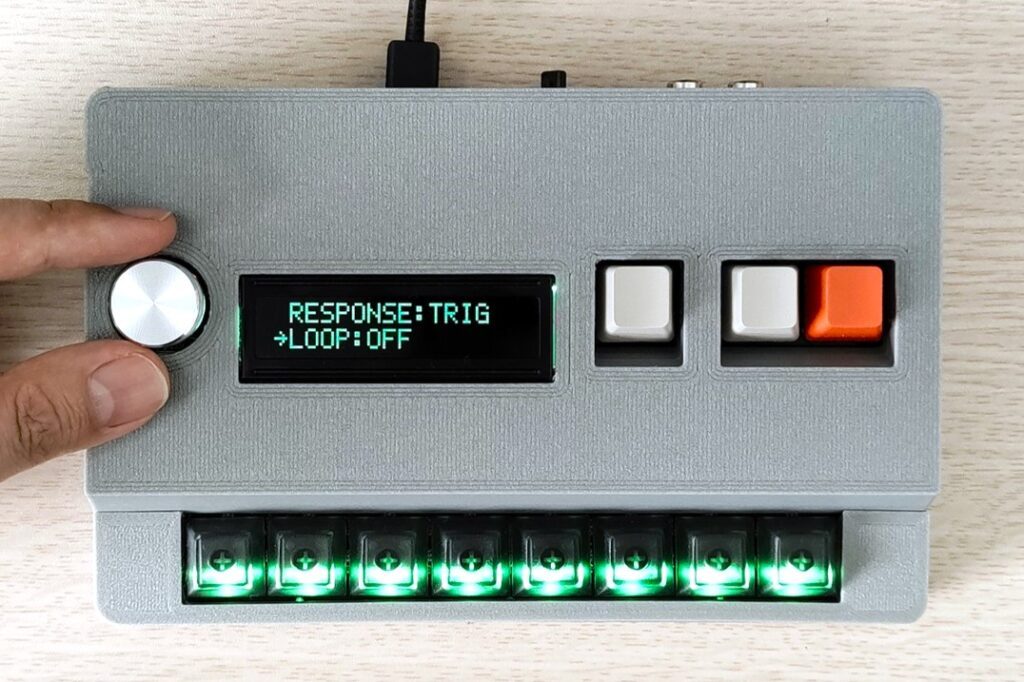
Only when you select pad response GATE and TRIGGER, the loop setting menu appears. By rotating the menu dial, you can go back and forth between pad response setting and loop setting.
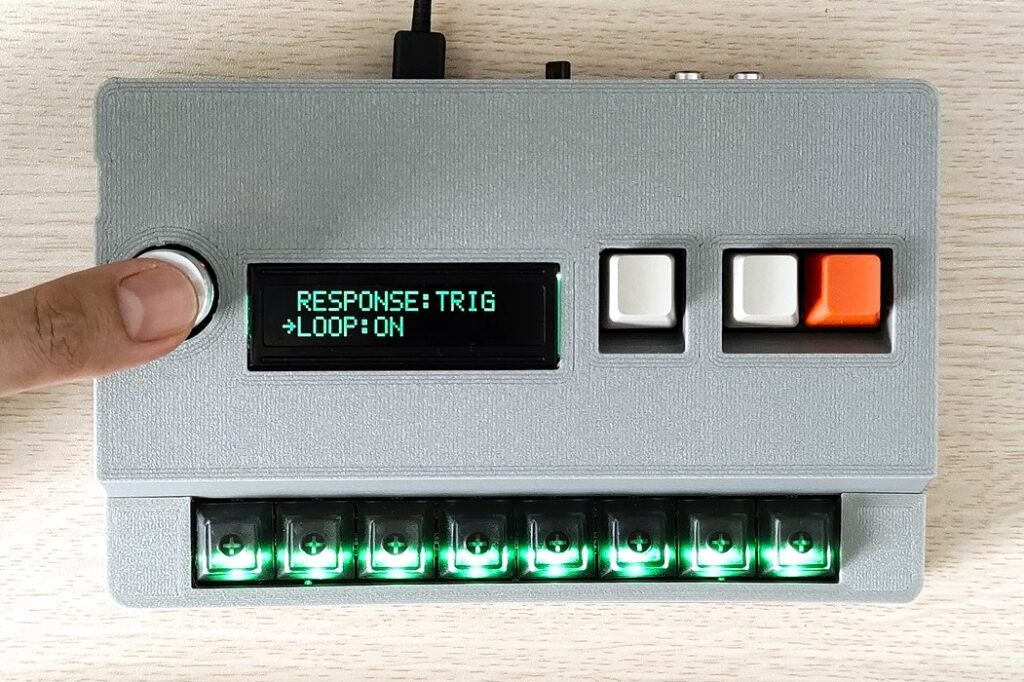
By pressing the menu dial, you can turn the loop ON and OFF.
SETTING
BACK LIGHT
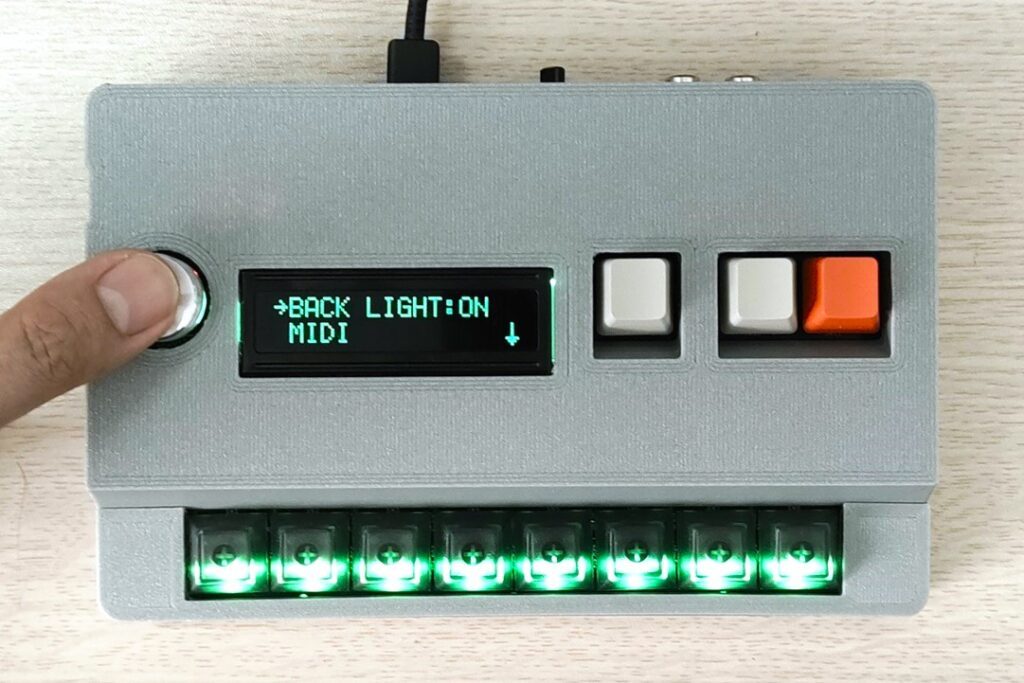
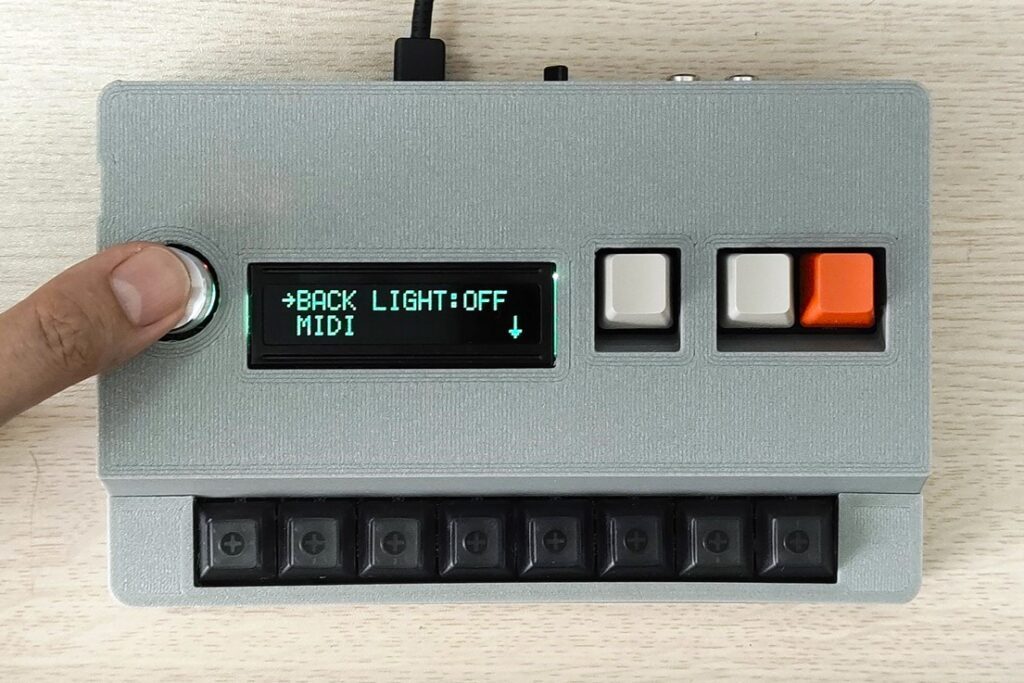
You can alternate on and off of the back light for pads every time you press the menu dial. The setting is saved in internal memory and it doesn’t vanish after power off.
MIDI CH (MIDI channels)
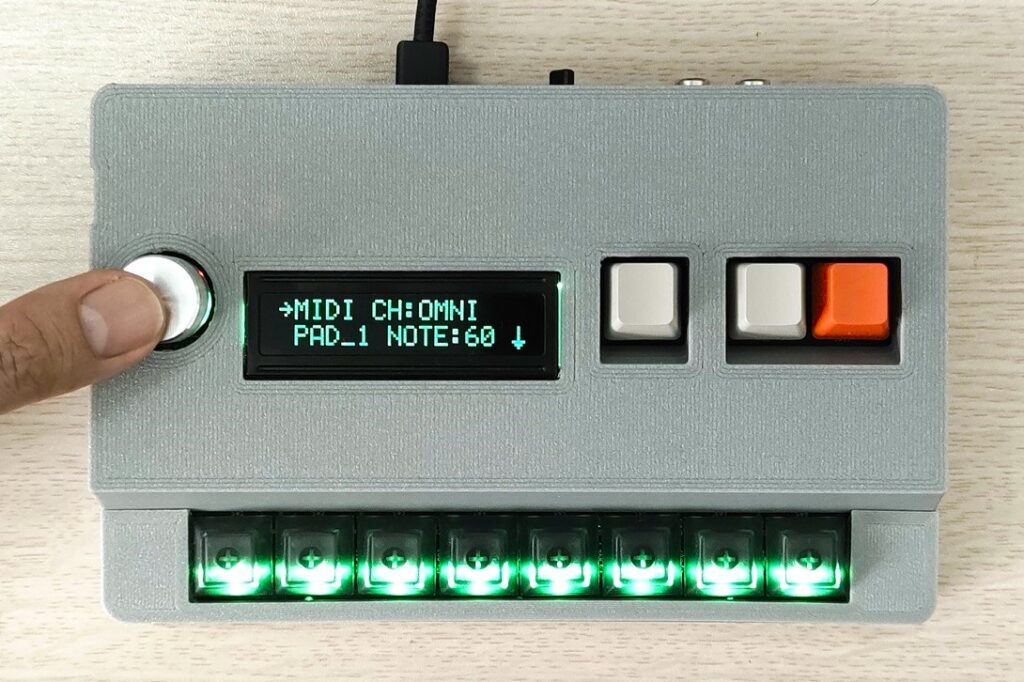
By rotating the menu dial, you can scroll up and down the menus.
Press the menu dial while the right arrow aligns to MIDI CH: XXX and enter the MIDI channel setting.
The cursor appears at right side.
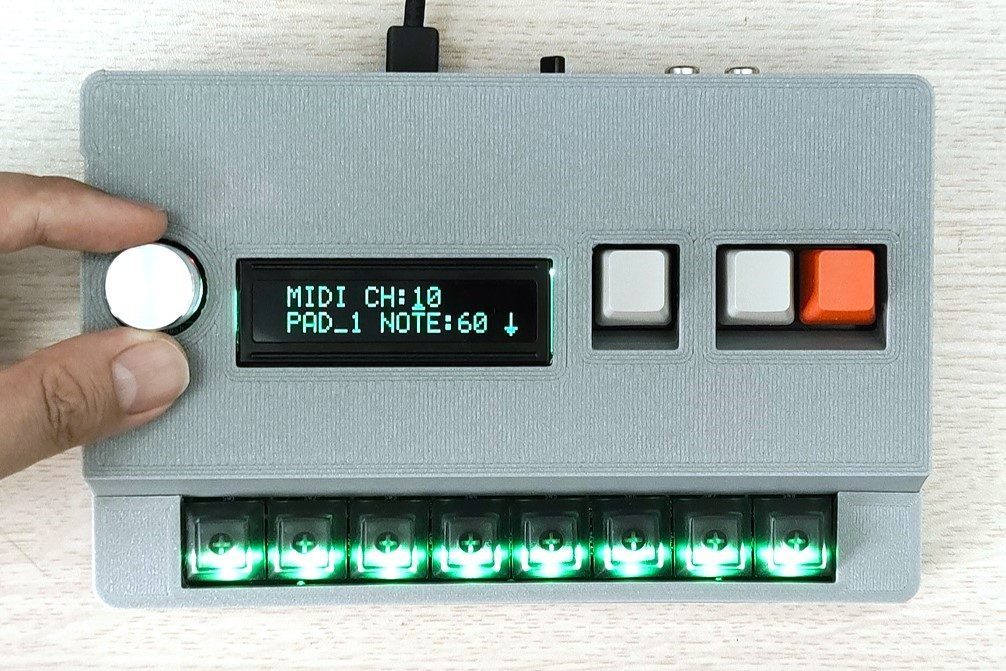
You can change the MIDI channel by rotating the menu dial.
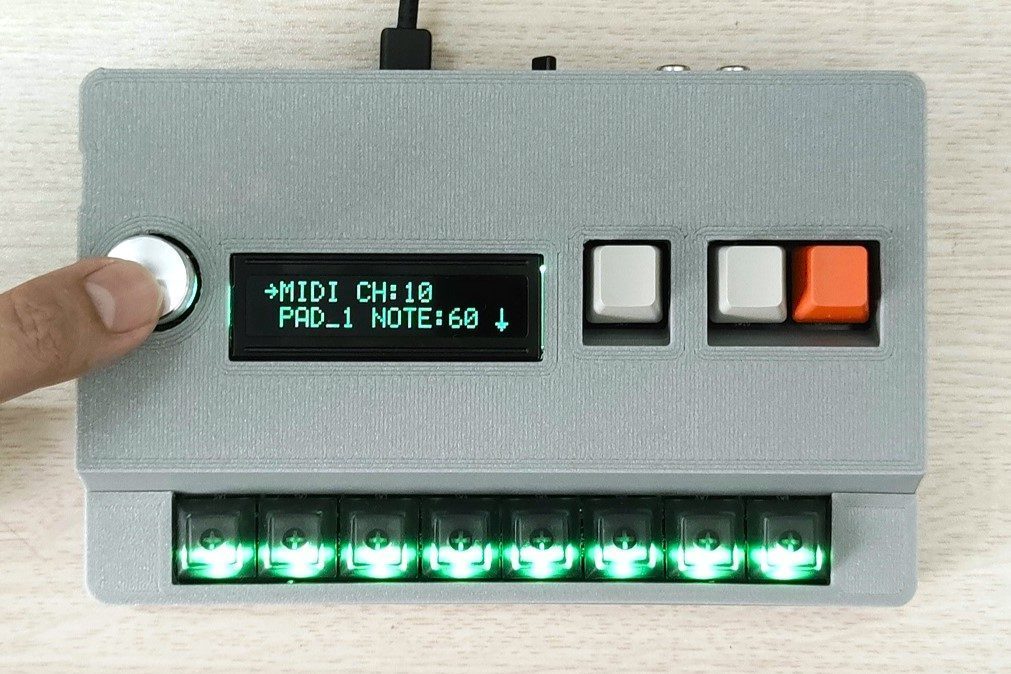
Press the menu dial to escape from the MIDI channel setting. The setting is saved in internal memory and it doesn’t vanish after power off.
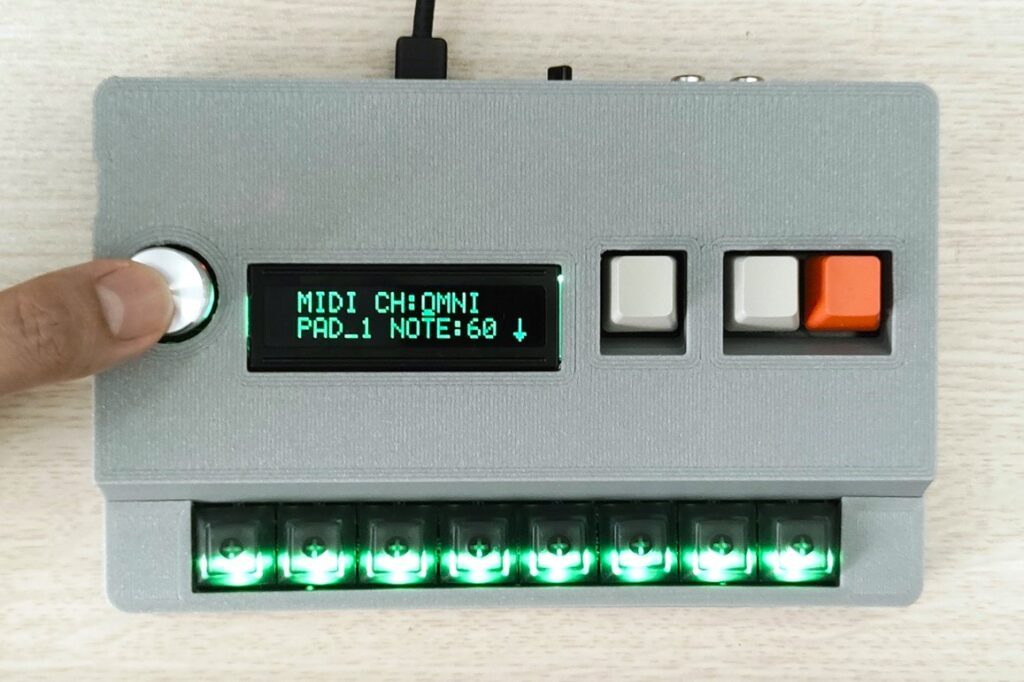
MIDI Note No.
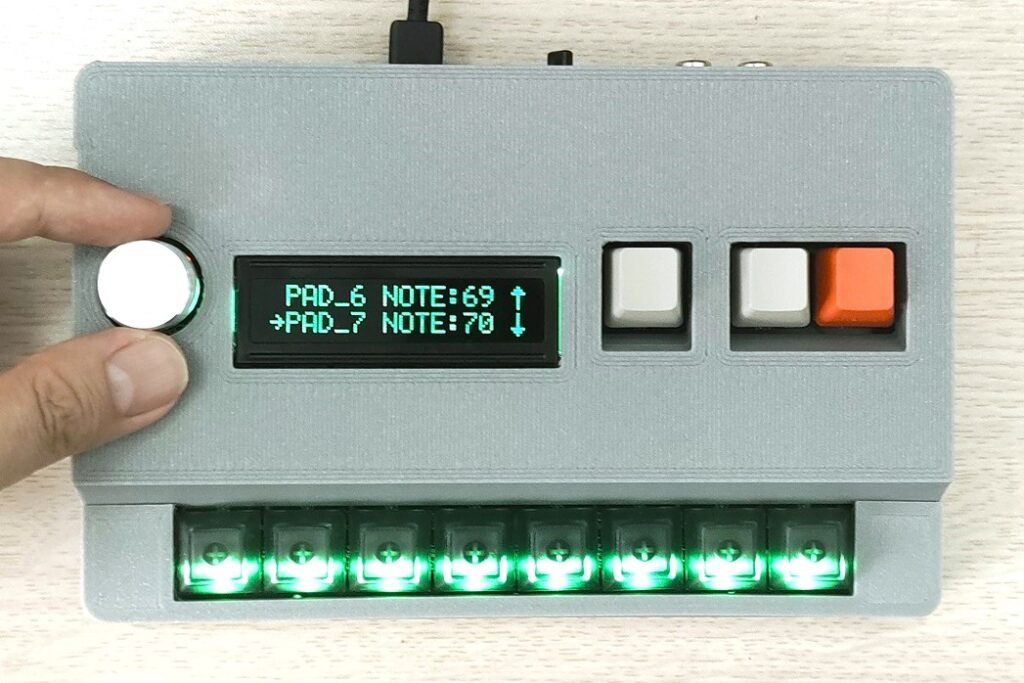
Select the pad (sound) which you want to assign the MIDI note number by rotating the menu dial. Press the menu dial to confirm the pad to be changed.
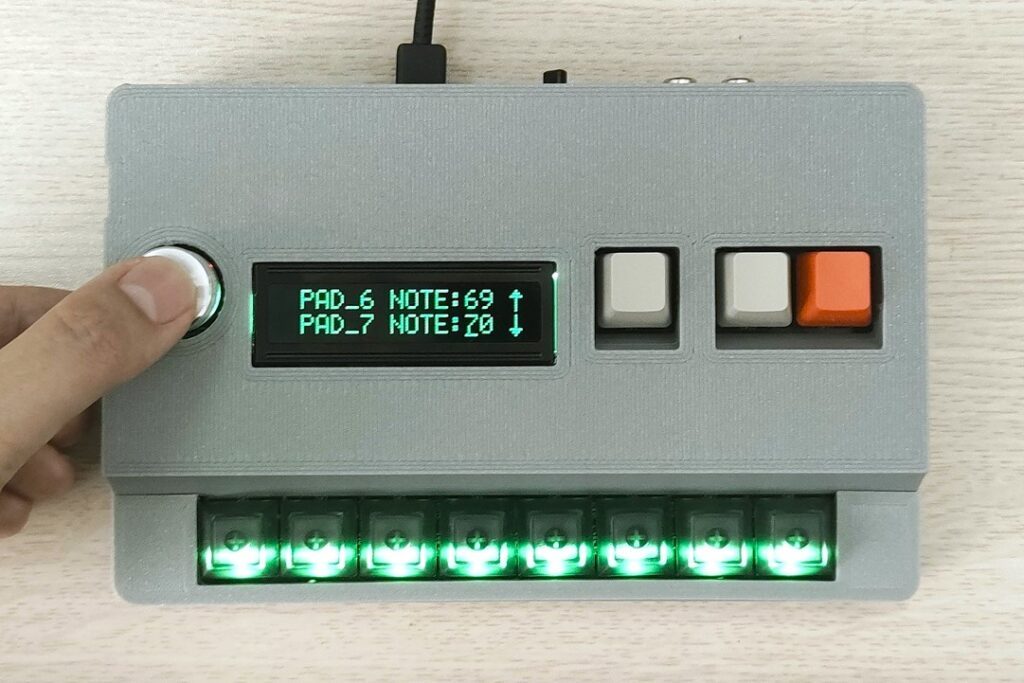
The cursor appears at right side.
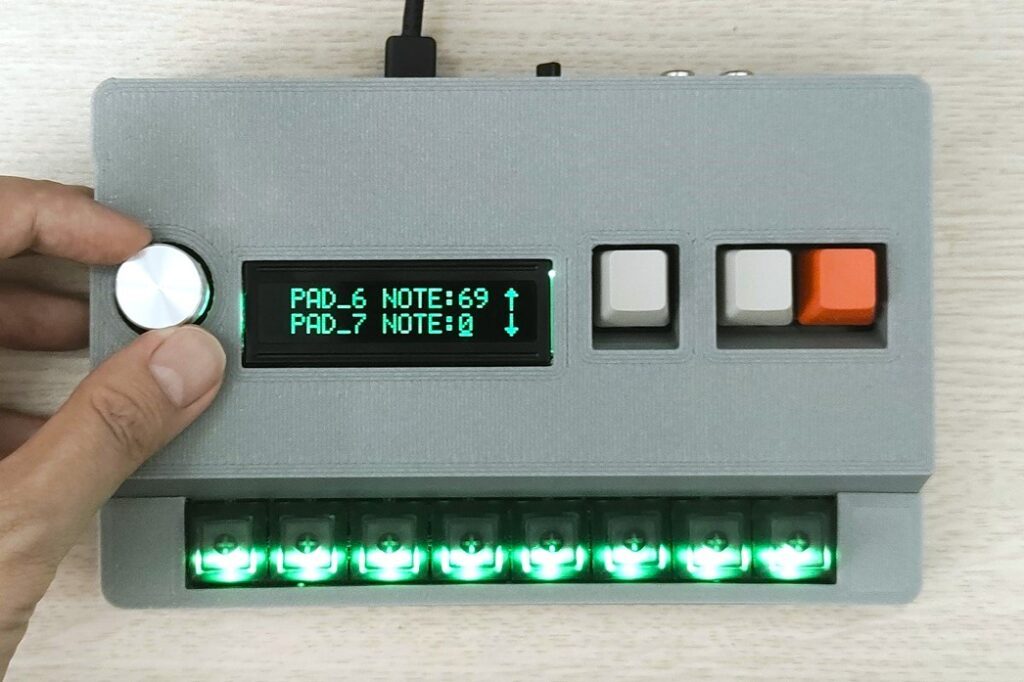
You can change the MIDI note number by rotating the menu dial.
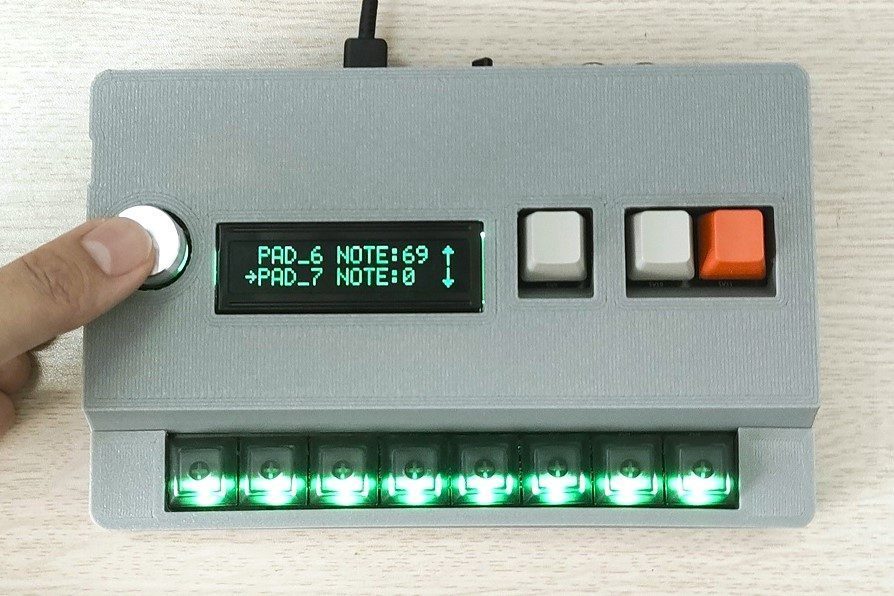
Press the menu dial to escape from the MIDI note number setting of the selected pad. The setting is saved in internal memory and it doesn’t vanish after power off.
FW : VERSION
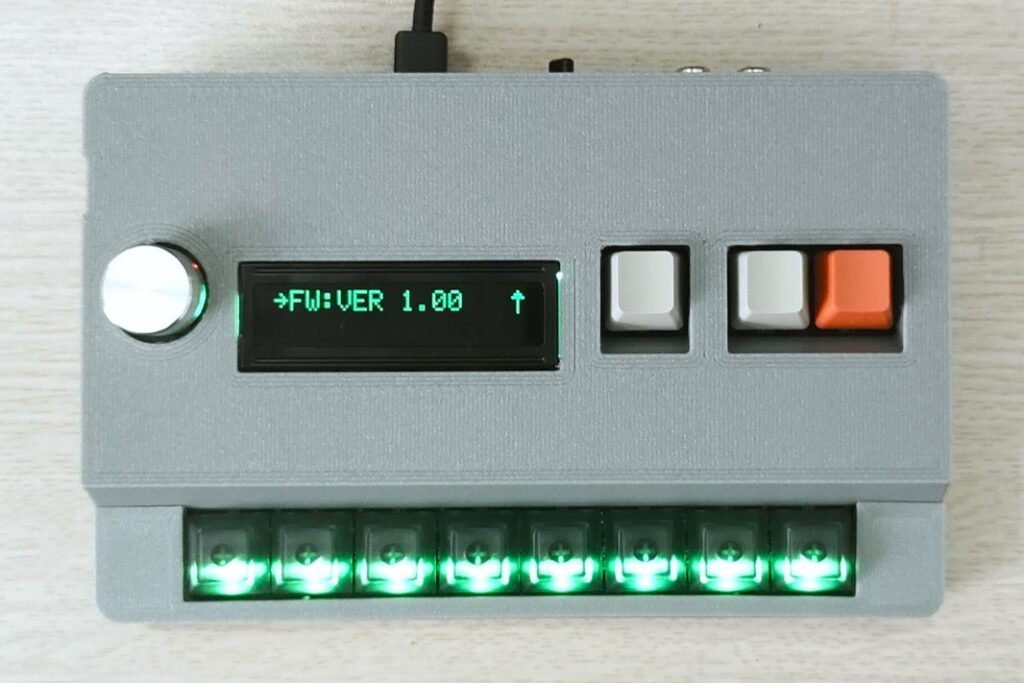
The firmware version is displayed at the last of the setting menus.